In my previous post, I explained WHY I chose Next.js instead of Django, MDX instead of BlockNote for the Closmore SalesOS.
The goal was simple: Total control over the HTML signal.
If you want AI agents to cite your work, you can't hide your content inside 10 layers of "Div Soup" from a standard block editor. You need clean, semantic code.
Here is exactly how I implemented it in Next.js 16, including the "final hurdle" that almost broke my layout.
Step 1: The Foundation (Next.js 16 Config)
First, install the official packages:
npm install @next/mdx @mdx-js/loader @mdx-js/react
Since I am using TypeScript (next.config.ts), the setup is slightly different from the old tutorials.
You have to tell Next.js to treat .mdx files as pages.
//next.config.ts
import type { NextConfig } from "next";
import createMDX from "@next/mdx";

const nextConfig: NextConfig = {
  pageExtensions: ["js", "jsx", "md", "mdx", "ts", "tsx"],
};

const withMDX = createMDX({});
export default withMDX(nextConfig);
You also need a file called mdx-components.tsx in your root folder. This is a "hook" that allows you to inject custom styles globally.
Make sure it is there.
//mdx-components.tsx
import type { MDXComponents } from 'mdx/types';

export function useMDXComponents(components: MDXComponents): MDXComponents {
  return {
    // This allows us to use custom components or HTML tags globally
    ...components,
  };
}
Step 2: The "Code Interface" (Component Mapping)
This is the most powerful part of MDX. I created a file called mdx-style.tsx.
Instead of writing CSS for every blog post, I created a mapping. I told Next.js:
"Every time you see a standard <p> tag in Markdown, give it my 'Closmore' 20px typography."
//app/salesos/_components/mdx-style.tsx
import React from 'react';
import Image from 'next/image';

export const closmoreComponents = {

  h1: ({ children }: any) => <h1 className="text-3xl font-bold mb-8">{children}</h1>,
  h2: ({ children }: any) => <h2 className="text-2xl font-bold mb-6">{children}</h2>,
  h3: ({ children }: any) => <h3 className="text-xl font-bold mb-4">{children}</h3>,

  p: ({ children }: any) => <p className="text-muted-foreground mb-4 text-[20px]">{children}</p>,

  ul: ({ children }: any) => <ul className="text-muted-foreground mb-5 text-[20px] list-disc pl-5">{children}</ul>,
  ol: ({ children }: any) => <ol className="text-muted-foreground text-[20px] list-decimal pl-5">{children}</ol>,
  li: ({ children }: any) => <li className="pl-1">{children}</li>,

  a: ({ children, href }: any) => (
    <a href={href} target="_blank" rel="noopener noreferrer" className="text-primary hover:underline font-medium">
      {children}
    </a>
  ),

  strong: ({ children }: any) => <strong className="font-bold text-zinc-900">{children}</strong>,
};
Step 3: The Content
Two files to render the blog page:
(1) The page.tsx - where you usually compare a page
(2) A markdown file - content.mdx - side by side with the page.tsx
3.1 The page.tsx
This is where the start of page rendering happens:// app/salesos/momentum/[slug]/page.tsx
import Content from './content.mdx'; // the markdown
import { closmoreComponents } from '../../_components/mdx-style';
export default async function m5_what_drive_sales() {
return (
<div className="w-full salesos">
<div className="max-w-4xl mx-auto mt-3 pt-5 md:pt-7 lg:pt-14 px-4 pb-20">
<p className="text-xs uppercase tracking-wide text-muted-foreground mb-4">Momentum · Sales Performance</p>
<Content components={closmoreComponents} />
</div>
</div>
);
}
3.2 The Markdown Content File
Prepare your content in markdown format :
//app/salesos/momentum/[slug]/content.mdx
## Two Pipeline Reports

Since then, I "automatically" started keeping two sales pipeline reports.

One for my CEO.

One for myself — with a Commission Estimation column.

Every Monday morning, I would only open the second one and work on those qualified leads with the best commission potential. I fell into a sales career — by chance.
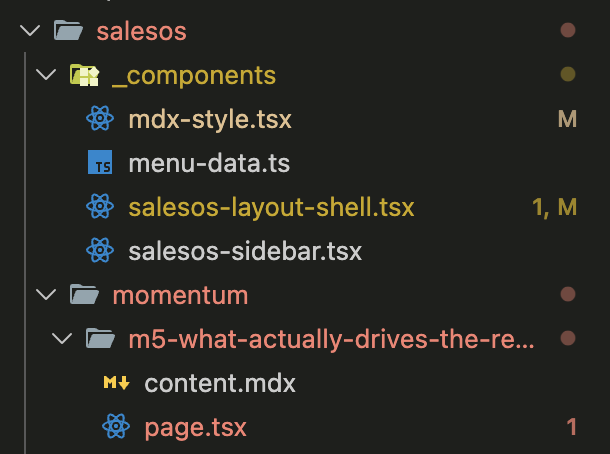
For clarify, it is the file structure:
Step 3: The "Final Hurdle" (The Figure Bug)
I hit a wall. In my design, I wanted images to have a border and a caption (the <figure> tag).
In Markdown, images are written like this: .
The problem? Markdown automatically wraps images in a <p> tag.
The result was a Hydration Error: <p><figure>...</figure></p>.
In HTML, you cannot put a "box" <figure> inside a "paragraph" <p>. The browser tried to fix it, React got confused, and my console turned red.
The Solution:
I set up a new component figure.tsx.
//components/ui/figure.tsx
import Image from 'next/image';

interface FigureProps {
  src: string;
  alt: string;
  caption?: string;
  width?: number;
  height?: number;
}

export const Figure = ({ src, alt, caption, width = 1200, height = 675 }: FigureProps) => {
  return (
    <figure className="my-8">
      <Image src={src} alt={alt} width={width} height={height} className="w-full rounded-lg border border-border" />
      {caption && <figcaption className="mt-2 text-sm text-muted-foreground">{caption}</figcaption>}
    </figure>
  );
};
Use <Figure> in app/salesos/_components/mdx-style.tsx
// app/salesos/_components/mdx-style.tsx
import { Figure } from '@/components/ui/figure';
...

export const closmoreComponents = {
  ...
  // IMAGES (Handles the Figure/Caption style)
  Figure: ({ src, alt, caption, width, height }: any) => <Figure src={src} alt={alt} caption={caption} width={width} height={height} />,
  ...
};
Quote it like that in the Markdown content.mdx
---

## Two Pipeline Reports

Since then, I "automatically" started keeping two sales pipeline reports.

One for my CEO.

One for myself — with a Commission Estimation column.

Every Monday morning, I would only open the second one and work on those qualified leads with the best commission potential. I fell into a sales career — by chance.

<Figure
  src="/salesos/momentum/m5-what-drives-sales-performance-closmore-commission.webp"
  alt="Two pipeline reports - one for the CEO, one for myself with commission estimation"
  caption="The second report — the one my boss never saw"
/>

And I was not alone.

---
The Result: Pure Signal
When I open "Chrome Inspect" now, I don't see rubbish. I see a clean, professional document that is ready for Google and ready for AI agents to index.
Feature Before (Blocknote) After (MDX)
DOM Depth 10+ layers of Divs 2 layers (Semantic)
Page Speed Database dependent Static (Instant)
Control Standard CSS Full React Power
Conclusion
MDX is a "piece of cake" for a techie, but for a Founder, it is a Strategic Advantage.
I’m not a professional software engineer, but I know that in the AI era, Technical Integrity = Search Authority. By building this "Code Interface," I’ve ensured that every Sales Lesson I write for Closmore is technically optimized for the next 10 years of search.
If you need help auditing your blog's "AI-Readability," reach out. I'm happy to share my full boilerplate.