When developing ClosMore AI — my B2B sales enablement solution — I wanted users to grab key prospect info directly from LinkedIn without using complicated APIs. So I decided to build a Chrome extension from scratch. Here’s how I set up the boilerplate, step by step.
Setting Up the Environment
We are using:
Next.js as backend (closmore-web)
Chrome Extension (MV3) frontend (closmore-extension)
Show folder structure and explain each part.
closmore/
├── closmore-web/        # Next.js app (frontend + backend)
└── closmore-extension/  # Chrome extension (MV3)
Step 1: Warm up with Hello World Extension
Follow along the Google documentation to create a hello world extension. Here we extracted key steps
Create a new folder for this extension
mkdir closemore-extension
cd closemore-extension
Create a new file in this directory called manifest.json.
{
  "name": "Hello Extensions",
  "description": "Base Level Extension",
  "version": "1.0",
  "manifest_version": 3,
  "action": {
    "default_popup": "hello.html",
    "default_icon": "hello_extensions.png"
  }
}
Download the icon to your directory, and be sure to change its name to match what's in the "default_icon" key.
For the popup, create a file named hello.html, and add the following code:
<html>
  <body>
    <h1>Hello Extensions</h1>
  </body>
</html>
The extension now displays a popup when the extension's action icon (toolbar icon) is clicked. You can test it in Chrome by loading it locally. Ensure all files are saved.
Load an unpacked extension
To load an unpacked extension in developer mode:
1. Go to the Extensions page by entering chrome://extensions in a new tab.
- Alternatively, click the Extensions menu puzzle button and select Manage Extensions at the bottom of the menu.
- Or, click the Chrome menu, hover over More Tools, then select Extensions.
2. Enable Developer Mode by clicking the toggle switch next to Developer mode.
3. Click the Load unpacked button and select the extension directory.
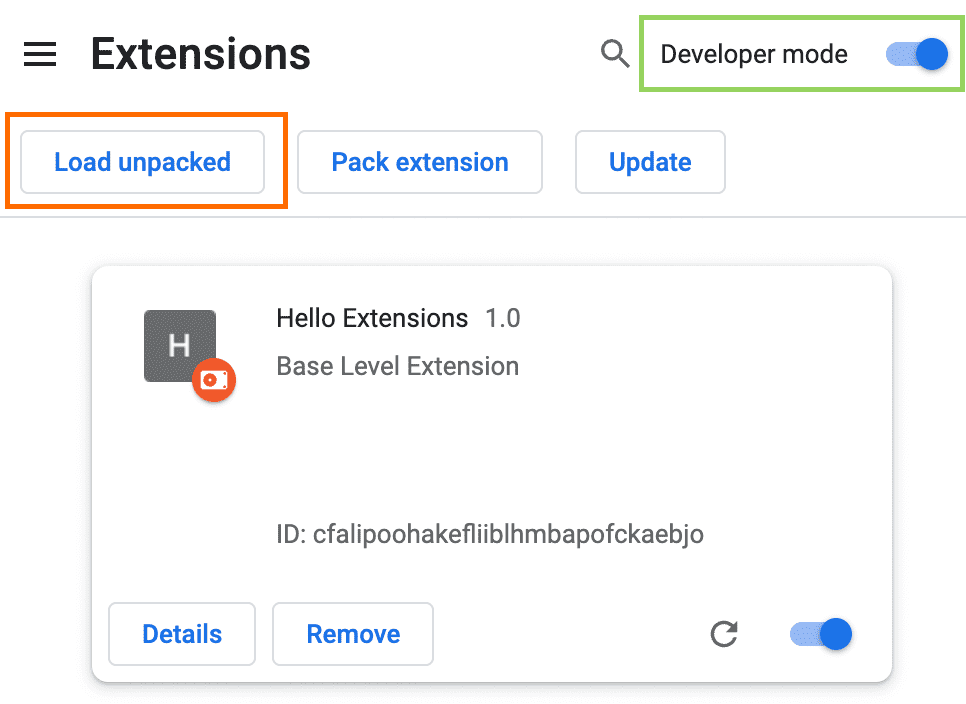
(diagram from google)
Ta-da! The extension has been successfully installed. If no extension icons were included in the manifest, a generic icon will be created for the extension.
Pin the extension
By default, when you load your extension locally, it will appear in the extensions menu (Puzzle). Pin your extension to the toolbar to quickly access your extension during development.
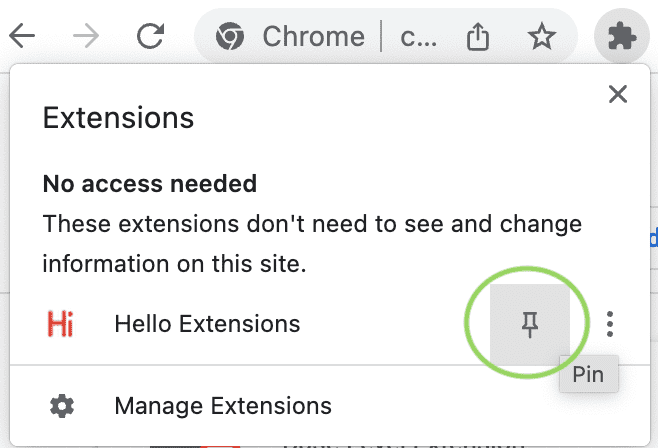
(diagram from google)
You may follow google documentation or the following tutorial that we made for ClosMore Linkedin extension.
Step 2: Extracting Data from LinkedIn
Show the chrome.scripting.executeScript approach.
Start with extracting just the name from a Linkedin profile. (say https://www.linkedin.com/in/amicewong/)
This works when the user clicks the button, for compliance.
Let's modify the code by adding the following into manifest.json:
  "permissions": ["scripting", "activeTab"],
  "host_permissions": ["https://*.linkedin.com/*"],
making the whole file becomes
{
  "name": "LinkedIn Profile",
  "description": "Obtaining LinkedIn Profile Information",
  "version": "1.0",
  "manifest_version": 3,
  "permissions": ["scripting", "activeTab"],
  "host_permissions": ["https://*.linkedin.com/*"],
  "action": {
    "default_popup": "popup.html",
    "default_icon": "closmoreai.png"
  }
}
Let's create popup.html to replace hello.html
<!DOCTYPE html>
<html>
<head>
<title>LinkedIn Profile</title>
<style>
body {
font-family: sans-serif;
width: 250px;
text-align: center;
}
button {
margin-top: 10px;
padding: 8px 16px;
}
</style>
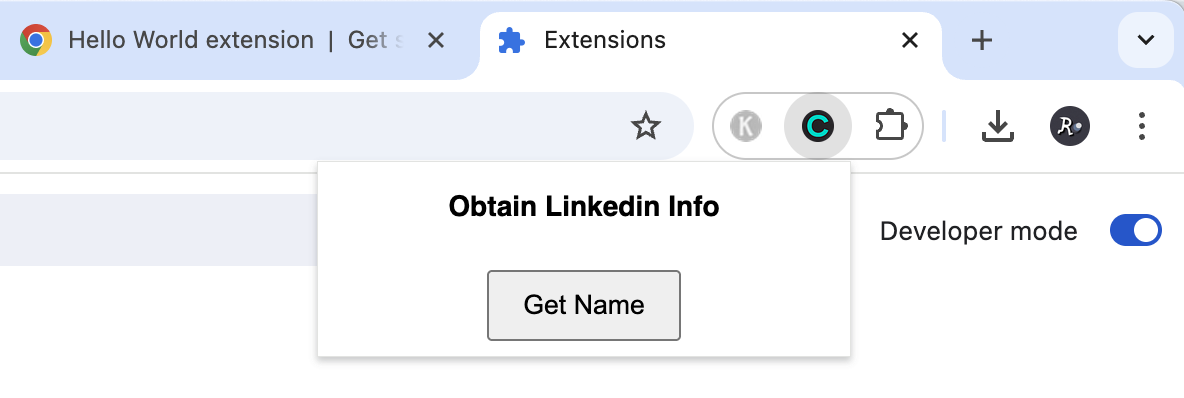
</head>Continue to create instruction and a button (Get Name)
<body>
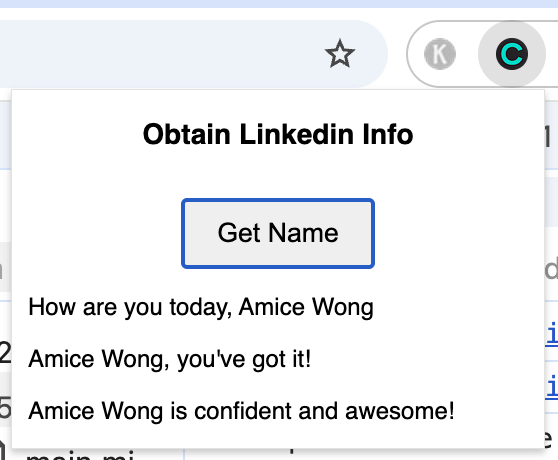
<h3>Obtain LinkedIn Info</h3>
<button id="get-name-btn">Get Name</button>
<script src="popup.js"></script>
</body>
</html>Now, refresh the extension in chrome://extensions/. and confirm the extension becomes it new face.
If there are filename change. You may consider to "remove" and load the extension again.
The "Get Name" button is monitored by script file popup.js, as follow:
document.getElementById('get-name-btn').addEventListener('click', async () => {
// Inject a content script into the active tab
let [tab] = await chrome.tabs.query({ active: true, currentWindow: true });
chrome.scripting.executeScript({
target: { tabId: tab.id },
func: getLinkedInName,
});
});
// This function runs **inside** the LinkedIn page
function getLinkedInName() {
const nameElement = document.querySelector('h1');
const name = nameElement ? nameElement.innerText.trim() : 'Name not found';
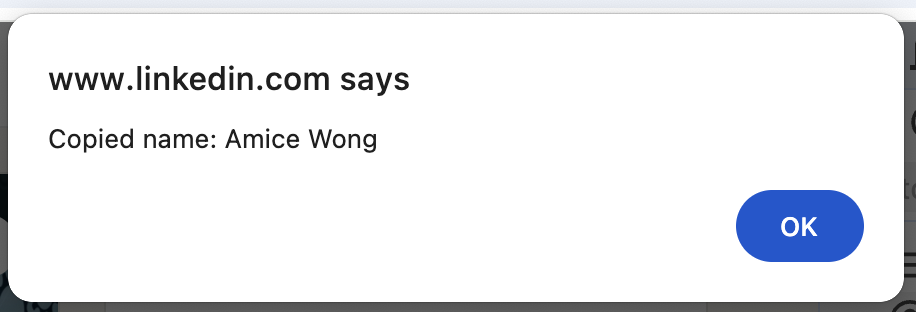
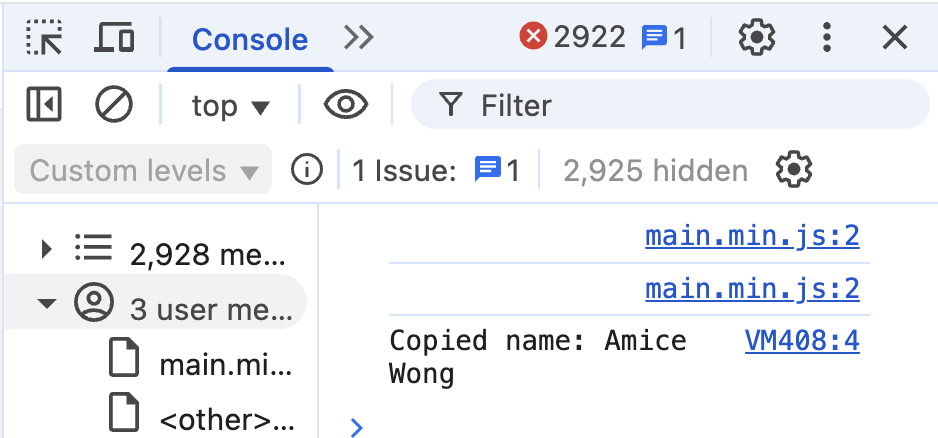
console.log('Copied name:', name);
alert(`Copied name: ${name}`); // just to show a visible result
}Now, refresh the extension and click on the "Get Name" button.
The popup up will be shown by above green highlighted.
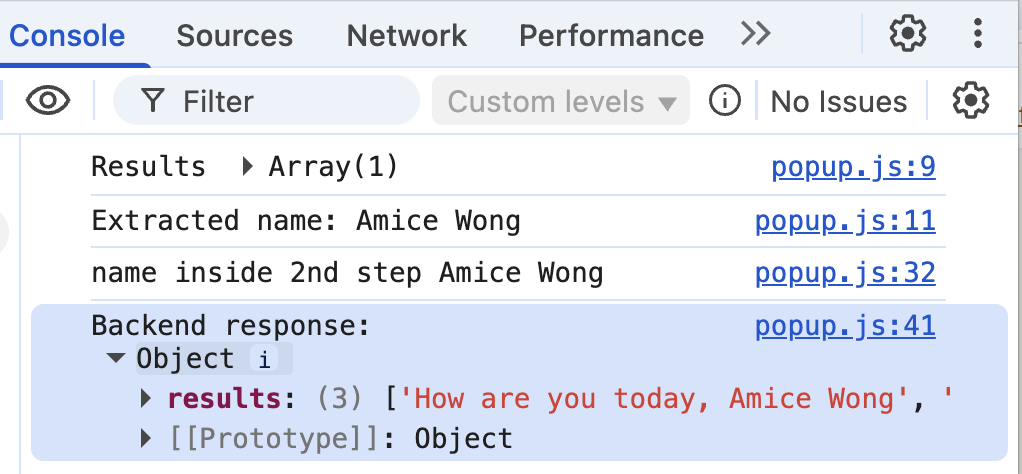
The console.log (the blue highlighted) will be found also.
Step 3: Connecting to Next.js Backend
Then send the extracted name to the backend via fetch.
Let's ride on the api built in the article Full-Stack Next.js with TypeScript & Shadcn - New API with Frontend Project Checklist.
The route.js of that that ClosMore backend make use of name to generate three sentences. We will make the chrome extension (client) “talk” to that backend via api request — the same architecture my team later use for AI-based cold email generation.
To recall, the route.js we have :
import { NextResponse } from 'next/server';

export async function POST(request) {
  try {
    // 1. Get the data from the request body
    const body = await request.json();
    const { name } = body; //destruct from body

    // 2. Validate the input
    if (!name || name.trim() === '') {
      return NextResponse.json({ error: 'Name is required' }, { status: 400 });
    }
    console.log('name =', name);
    // ToDo...

    // 3. Create the simple, personalized responses
    const responses = [`How are you today, ${name}`, `${name}, you've got it!`, `${name} is confident and awesome!`];

    // 3b. Simulate a short delay, like a real API call would have
    await new Promise((resolve) => setTimeout(resolve, 500));

    // 4. Return the successful response as JSON
    return NextResponse.json({ results: responses });

  } catch (error) {
    // Handle any unexpered errors
    console.error('APU Error:', error);
    return NextResponse.json({ error: 'An expected error occured' }, { status: 500 });
  }
}
// Added async function
async function sendNameToBackend(name) {

  // Added! - (1) Send the request to backend
  try {
    const apiUrl = 'http://localhost:3000/api/generate';
    const res = await fetch(apiUrl, {
      method: 'POST',
      body: JSON.stringify({ name }),
    });

    const data = await res.json();
    console.log('Backend response:', data);

    // Added! - (2) Render the Response
    const resultsDiv = document.getElementById('results');
    resultsDiv.innerHTML = ''; // clear previous
    data.results.forEach((sentence) => {
      const p = document.createElement('p');
      p.textContent = sentence;
      resultsDiv.appendChild(p);
    });

  } catch (err) {
    console.error('Error sending to backend:', err);
    alert('Error sending to backend');
  }
}
document.getElementById('get-name-btn').addEventListener('click', async () => {
  let [tab] = await chrome.tabs.query({ active: true, currentWindow: true });
  const results = await chrome.scripting.executeScript({
    target: { tabId: tab.id },
    func: getLinkedInName,
  });

  console.log('Results', results); // not showing!
  const name = results[0]?.result?.name;
  console.log('Extracted name:', name); // not showing!

  if (!name || name === 'Name not found') {
    alert('Could not find name on this page.');
    return;
  }

  // Send to backend
  await sendNameToBackend(name);
});

// This get the name as previous step
function getLinkedInName() {
  const nameElement = document.querySelector('h1');
  const name = nameElement ? nameElement.innerText.trim() : 'Name not found';
  console.log('Copied name:', name);
  return { name }; // changed: return the name or error
}

// Added async function
async function sendNameToBackend(name) {
....(as above)...
}
Putting a placeholder of the response - results - in the popup.htm
    <button id="get-name-btn">Get Name</button>

    <!-- Add this div to show backend results -->
    <div id="results" style="margin-top: 10px; text-align: left"></div>

    <script src="popup.js"></script>
Step 4: Confirm the Backend works with HTTPS
In the backend route.js, we have to By adding CORS headers with a '*' on top of the response:
    // 4. Return the successful response as JSON
    // return NextResponse.json({ results: responses });

    // 4. Return the successful response as JSON with CORS headers
    const response = NextResponse.json({ results: responses });
    response.headers.set('Access-Control-Allow-Origin', '*');
    response.headers.set('Access-Control-Allow-Methods', 'POST, OPTIONS');
return response;response.headers.set('Access-Control-Allow-Origin', '*');with this:
response.headers.set('Access-Control-Allow-Origin', 'chrome-extension://<YOUR_EXTENSION_ID>');