
I use the following checklist to quickstart any new Next.js project. This is my personal, step-by-step guide to go from an empty folder to a working full-stack application..
Step 1: Initial a project
First, let's initialize the project. Open your terminal and use npx to run the latest version of the Next.js setup script. We'll name our project 'closmore'
npx create-next@latest closmore
The installer will ask you a few questions. Choose the options you're most comfortable with (I recommend TypeScript, Tailwind CSS, and the App Router for modern projects).
Once it's finished, navigate into the new directory and open it in your code editor.
cd closmore
In VSCode --> Open New Windows --> to the folder to closmore
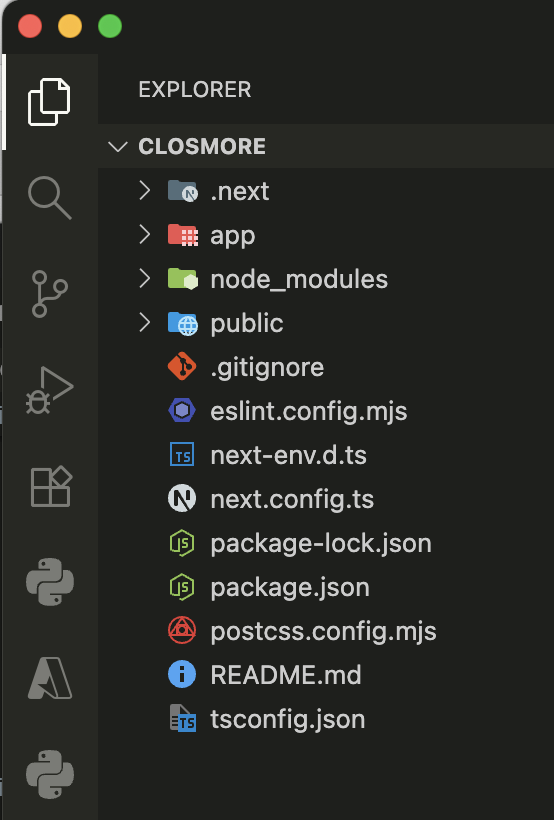
You can now see the basic Next.js project structure.
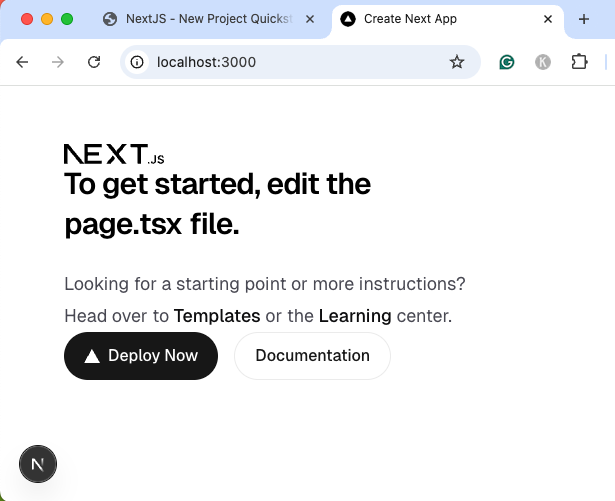
Let's run the development server to see the default template site.
npm run dev
Visit http://localhost:3000 in the browser.
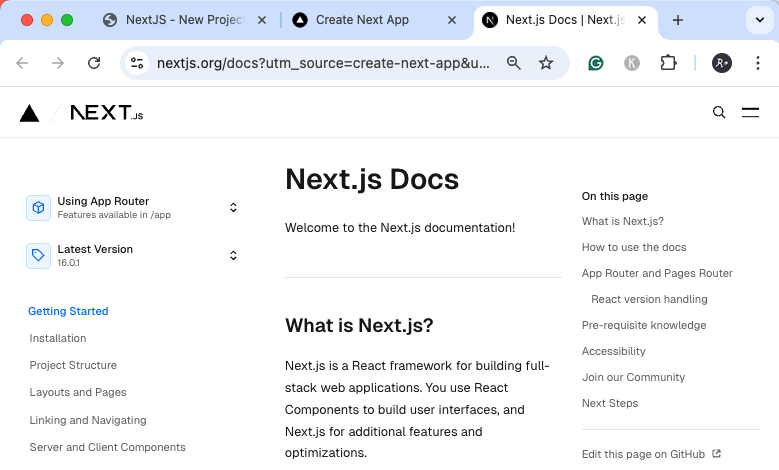
Click Documentation. Next.js portal contains great documentation on project setup that we may follow.
Step 2: Set Up Git Repository
Before writing any real code, it's crucial to set up version control.
In VS Code, open a new terminal and make sure you are in the project folder. Let's set up a Git repository for this project.
git init
git add .
git commit -m "Initial commit: Closmore Next.js project setup"
Next, go to GitHub and create a new, empty repository (e.g., "closmore"). Then, connect your local repository to the remote one on GitHub.
git remote add origin [YOUR_GITHUB_REPO_URL].git
git push -u origin main
Confirm on GitHub that this initial commit has been pushed successfully.
Step 3: Configure Your Environment
Install Core Dependencies
As your project grows, you'll add more packages. For this project, you might need the OpenAI library later.
npm install openai ......(if any in the phase)
Set Up Environment Variables
M Create a .env file in the root of your project to store sensitive credentials like API keys. For now, we can leave it empty.
Make sure this file is ignored by Git by adding it to your .gitignore file. The default Next.js .gitignore should already include this.
# env file
.env*
Step 4: Create Your First API Route (The Backend)
Next.js allows us to build the backend right inside our project. We'll create a simple "dummy" API endpoint that we can test before building the full frontend.
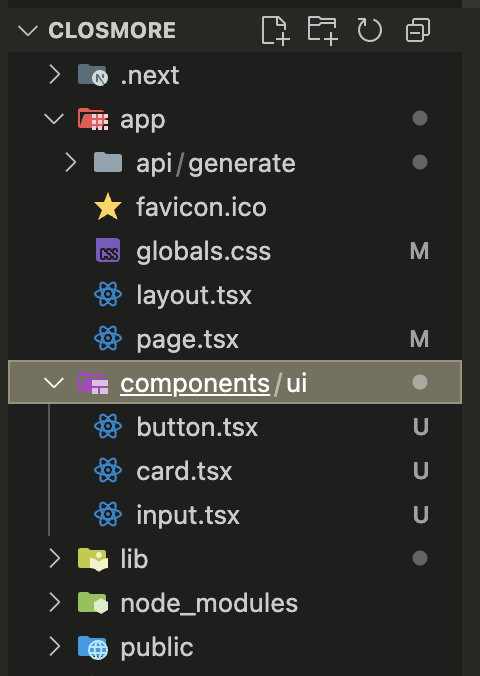
Create the following folder structure and file:
app/
└── api/
    └── generate/
        └── route.js  <-- This is the API filef
Here is the code for our simple API. It will take a name as input and return a few personalized sentences.
import { NextResponse } from 'next/server';

export async function POST(request) {
  try {
    // 1. Get the data from the request body
    const body = await request.json();
    const { name } = body; //destruct from body

    // 2. Validate the input
    if (!name || name.trim() === '') {
      return NextResponse.json({ error: 'Name is required' }, { status: 400 });
    }

    // .....your future code here....

    // 3. Create the simple, personalized responses
    const responses = [`How are you today, ${name}`, `${name}, you've got it`, `${name} is confident and awesome!`];

    // 3b. Simulate a short delay, like a real API call would have
    await new Promise((resolve) => setTimeout(resolve, 500));

    // 4. Return the successful response as JSON
    return NextResponse.json({ results: responses });
  } catch (error) {
    // Handle any unexpected errors
    console.error('APU Error:', error);
    return NextResponse.json({ error: 'An expected error occured' }, { status: 500 });
  }
}
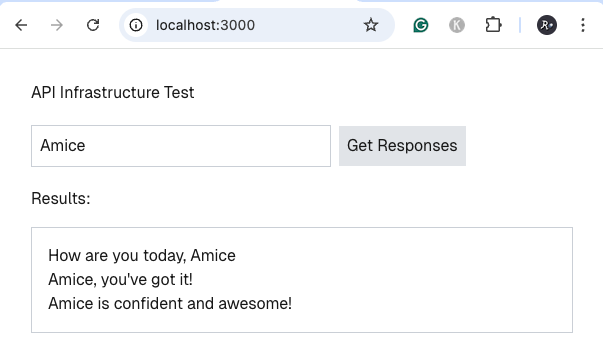
You can test this endpoint using a tool like Postman to ensure it's working correctly.

Step 5. Build the Minimal Frontend
Now let's build a simple interface to interact with our API. We will edit the main page of our application.
File: app/page.tsx
This is the Frontpage of the webapp. Delete the file's default content. We will no longer use that. Put the following instead.
'use client';
import { useState } from 'react';
export default function Home() {
// 1. Define all use states
const [name, setName] = useState(''); // State for the input field
const [results, setResults] = useState([]); // State for the API results
const [isLoading, setIsLoading] = useState(false); // State to show a loading message
const [error, setError] = useState(''); // State for any errors
// 2. Initialize the states and Compose the API request
const handleSubmit = async (event: any) => {
event.preventDefault(); // Prevent the form from reloading the page
setIsLoading(true);
setError('');
setResults([]);
try {
const response = await fetch('/api/generate', {
method: 'POST',
headers: {
'Content-Type': 'application/json',
},
body: JSON.stringify({ name: name }), // It sends the correct JSON
});
if (!response.ok) {
const errorData = await response.json();
throw new Error(errorData.error || `Error: ${response.status}`);
}
const data = await response.json();
setResults(data.results); // It expects a "results" key in the response
} catch (err: any) {
setError(err.message);
} finally {
setIsLoading(false);
}
};
return (
// 3. Rending HTML
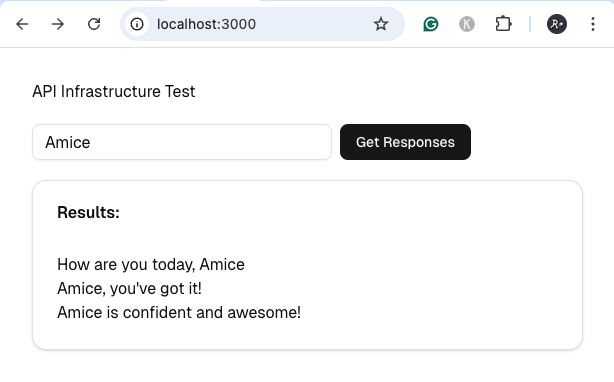
<main className="p-8 font-sans">
<h1 className="mb-5">API Infrastructure Test</h1>
<form onSubmit={handleSubmit}>
<input type="text" value={name} onChange={(e) => setName(e.target.value)} placeholder="Enter a name (e.g., Amice)" className="p-2 mr-2 border border-gray-300 w-[300px]" required />
<button type="submit" disabled={isLoading} className="p-2 bg-gray-200 cursor-pointer">
{isLoading ? 'Generating...' : 'Get Responses'}
</button>
</form>
{error && <p className="mt-4 text-red-500">Error: {error}</p>}
{results.length > 0 && (
<>
<h2 className="mt-5">Results:</h2>
<div className="p-4 mt-4 border border-gray-300">
<ul>
{results.map((result, index) => (
<li key={index}>{result}</li>
))}
</ul>
</div>
</>
)}
</main>
);
}
npm run dev
Step 6: Adding TypeScript for Robustness
npm run build
  // 1.  Define all use states
  const [name, setName] = useState<string>(''); // State for the input field
  const [results, setResults] = useState<string[]>([]); // State for the API results
  const [isLoading, setIsLoading] = useState<boolean>(false); // State to show a loading message
  const [error, setError] = useState<string | null>(null); // State for any errors

  // 2. Initialize the states and Compose the API request
  const handleSubmit = async (event: React.FormEvent<HTMLFormElement>) => {
    event.preventDefault(); // Prevent the form from reloading the page
    setIsLoading(true);
    setError(null);
    setResults([]);
Step 7. Styling with Shadcn/ui
To give our app a professional, minimalist style, we'll use shadcn/ui. It's not a component library; instead, it lets you copy and paste beautifully designed components directly into your project.
Make sure your development server is stopped.
7.1. Initialize Shadcn
In your project's root folder, run the init command. It will ask a few questions; the default answers are usually fine.
npx shadcn@latest init
7.2. Install Shadcn components
Next, we'll add the specific components we need for our page.
npx shadcn@latest add button input card
This command creates a new components/ui folder and adds button.tsx, input.tsx, and card.tsx to your project. You can now use these in your code.
7.3. Integrate into app/page.tsx
Now, we'll update our page to use these new components.
Change 1 - Import the components
// --- CHANGE 1: Import React for types and the new components ---
import { Button } from '@/components/ui/button';
import { Input } from '@/components/ui/input';
import { Card, CardContent, CardHeader, CardTitle } from '@/components/ui/card';
Change 2 - Put flexbox for proper alignment within the form
      {/* --- CHANGE 2: Added flexbox for proper alignment --- */}
      <form onSubmit={handleSubmit} className="flex items-center space-x-2">
      {/* <form onSubmit={handleSubmit}> */}
Change 3 - Replace <input> with <Input>
        {/* --- CHANGE 3: Replaced <input> with <Input> --- */}
        <Input
          type="text"
          value={name}
          onChange={(e) => setName(e.target.value)}
          placeholder="Enter a name (e.g., Amice)"
          className="w-[300px]" // Kept your original width
          required
        />
        {/* <input
          type="text"
          value={name}
          onChange={(e) => setName(e.target.value)}
          placeholder="Enter a name (e.g., Amice)"
          className="p-2 mr-2 border border-gray-300 w-[300px]"
          required /> */}
Change 4 - Replace <button> with <Button>
        {/* --- CHANGE 4: Replaced <button> with <Button> --- */}
        <Button type="submit" disabled={isLoading}>
        {/* <button type="submit" disabled={isLoading} className="p-2 bg-gray-200 cursor-pointer"> */}
Change 5 - Implement Card to the API Result
          {/* --- CHANGE 5: Put the list of response into a Card */}
          <Card className="mt-5">
            <CardHeader>
              <CardTitle>Results:</CardTitle>
            </CardHeader>
            <CardContent>
              <ul>
                {results.map((result, index) => (
                  <li key={index}>{result}</li>
                ))}
              </ul>
            </CardContent>
          </Card>

          {/* <h2 className="mt-5">Results:</h2>
          <div className="p-4 mt-4 border border-gray-300">
            <ul>
              {results.map((result, index) => (
                <li key={index}>{result}</li>
              ))}
            </ul>
          </div> */}
Final version is awesome!
And there you have it! We've built a full-stack API and Frontend application in a single Next.js project, complete with professional styling. You can use it as you boilerplate and further develop with your customized code. Happy Coding!