Table of Contents
- Why Migrate & Check Your Neon DB Location
- Export Data via the Neon Console
- Back Up the Database via Terminal
- Create a New Project in an AWS Region
- Restore the Database via Terminal
- Update
.envLocally and in Production - Test the Migration
1. Why Migrate & Check Your Neon DB Location
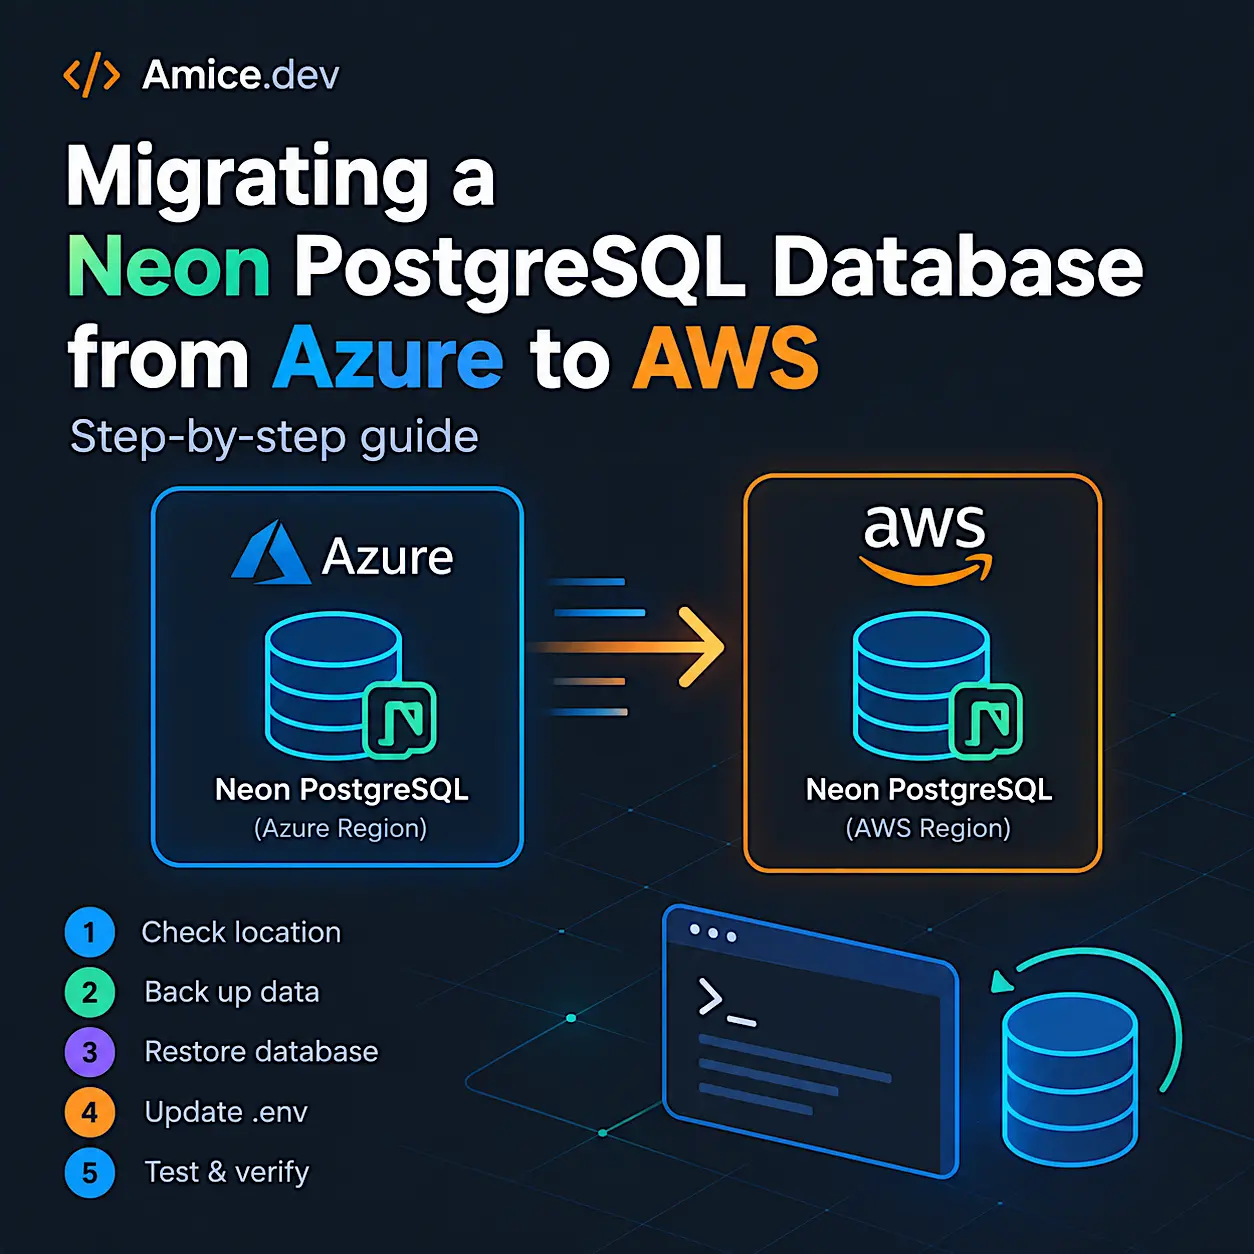
Neon announced that its Azure regions were deprecated on April 7, 2026. Projects running in Azure regions should be migrated to another region.
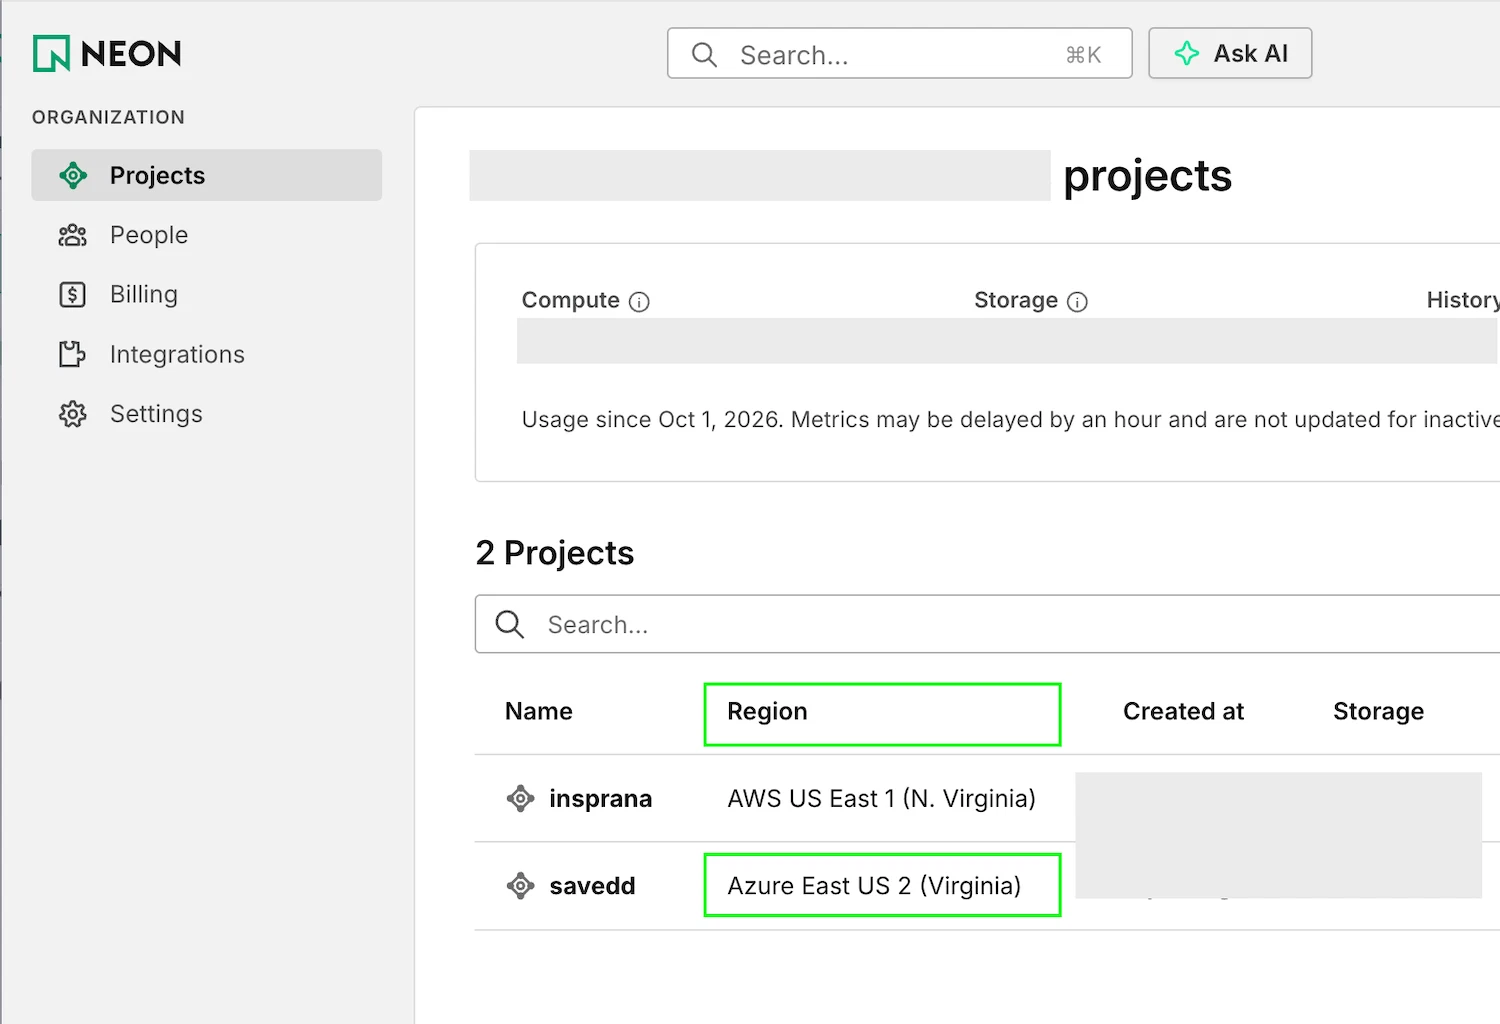
Before starting the migration, check which region your Neon project is currently using.
In the Neon Console, open your project and check the connection details. You can also identify an Azure region from the hostname in the connection string.
For example, a hostname containing azure.neon.tech indicates that the project is running in an Azure region.
In my case, the old project was using the Azure East US 2 region.
2. Export Data via the Neon Console
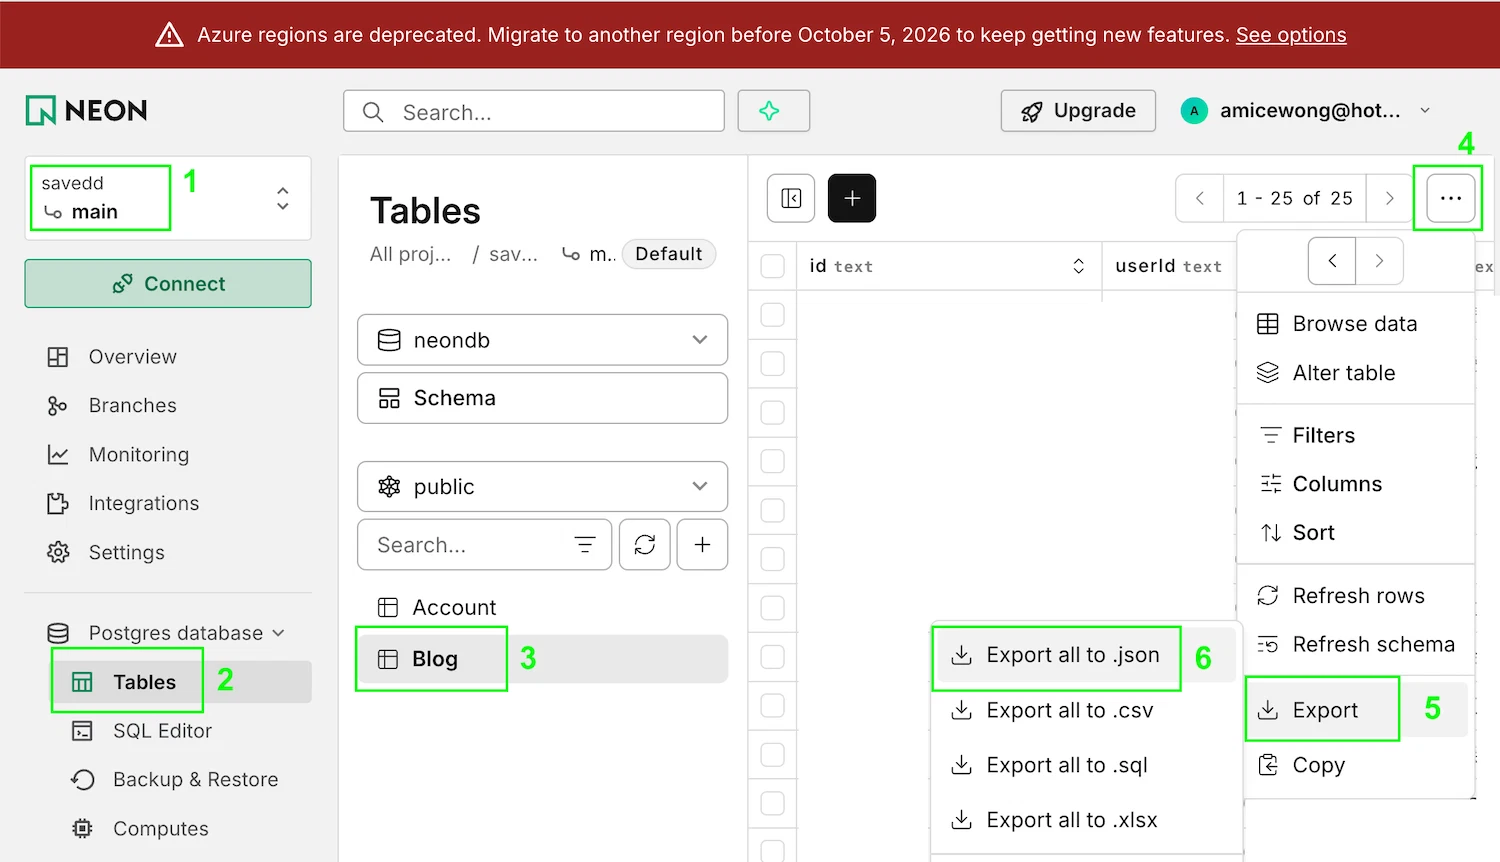
Before doing anything else, I wanted to have an additional backup of the important data.
For this project, I used the Neon Console to export the database tables. This gave me a simple, human-readable backup that I could keep separately from the database dump I created later.
This step is optional if you already have a proper database backup, but for a migration, I prefer having more than one safety layer.
3. Back Up the Database via Terminal
For the actual database backup, I used PostgreSQL's pg_dump command.
First, install the PostgreSQL client tools if they are not already available on your computer.
pg_dump --versionI created a dedicated directory for the migration backup:
mkdir -p ~/neon-migration-backups
chmod 700 ~/neon-migration-backups
I then stored the old Neon connection string in an environment variable. The operation on command line becomes easier.
read -s "NEON_URL?Paste your Neon connection string: "
echo
export NEON_URL

(Then copy and past the string from Neon as follow, exclude the quotes)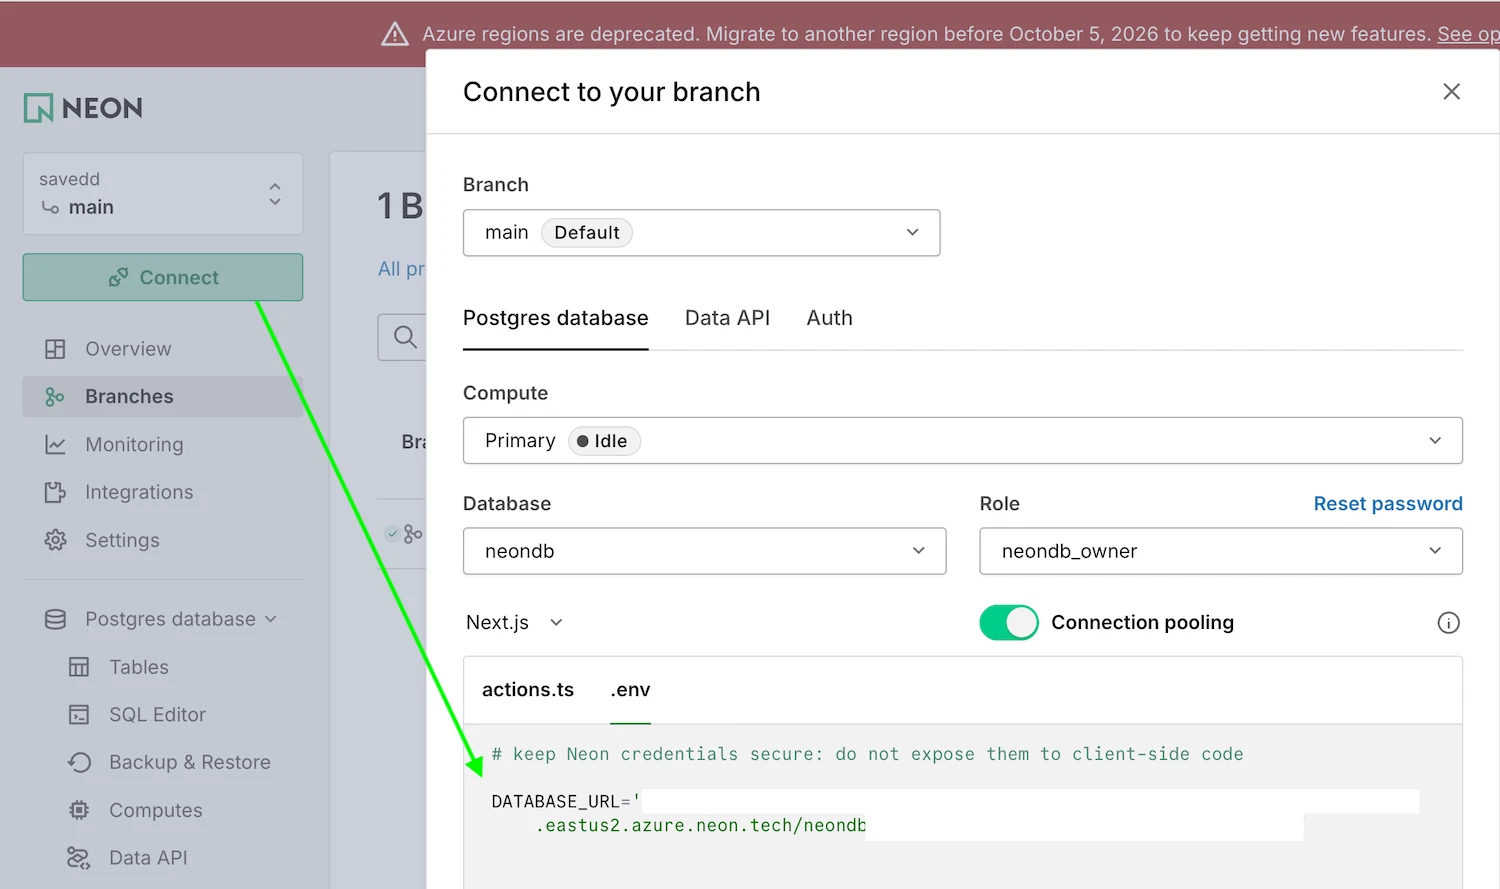
Then I created a PostgreSQL custom-format backup:
pg_dump "$NEON_URL" \
  --format=custom \
  --no-owner \
  --no-acl \
  --file="$HOME/neon-migration-backups/demo-project-1.dump"
After creating the backup, I verified that the archive was readable:
pg_restore --list \
  ~/neon-migration-backups/demo-project-1.dump \
  | head -20
The output showed the database information and the tables included in the backup. This gave me confidence that I had a usable backup before touching the original database.
In addition, you can specify one table (eg. pageview) you are mostly concerned with.
pg_restore --list ~/neon-migration-backups/demo-project-2.dump | grep -i pageview4. Create a New Project in an AWS Region
I created a new Neon project in an AWS region and then restored the database into it.
When creating the new project, I selected an AWS region instead of an Azure region. (Actually only AWS regions are available now)
For this migration practice, I selected AWS US East 1.
After creating the project, Neon provided a new PostgreSQL connection string for the new database.
5. Restore the Database via Terminal
I stored the new connection string in another environment variable. GET the credential in you NEWLY CREATED PROJECT.
read "NEW_NEON_URL?Paste the NEW Neon connection string: "
export NEW_NEON_URL
Then I restored the database backup into the new Neon project:
pg_restore \
  --dbname="$NEW_NEON_URL" \
  --no-owner \
  --no-acl \
  ~/neon-migration-backups/demo-project-1.dump
After the restore completed, I opened the new Neon project in the Console and checked the database tables.
The tables and existing data were there, so the database migration itself was successful.
6. Update .env Locally and in Production
At this point, the database has moved, but the application is still pointing to the old Neon project.
First, I updated the local .env file with the new Neon connection string.
DATABASE_URL="your-new-neon-connection-string"I restarted the local application and tested it against the new database. My project is a NextJS, run npm run dev to test in the local environment.
For the production application, my source code is stored in GitHub, but the .env file is not committed to GitHub (open standard :P). The production environment variable is stored directly on the server.
I therefore SSHed into the server, updated the production .env file, and replaced the old DATABASE_URL with the new connection string.
After updating the environment variable, I restarted the application with PM2:
pm2 restart <app-name>There was no need to upload the project again because the application code itself had not changed. Only the database connection had changed.
7. Test the Migration
Finally, I tested the live application.
I checked the database-backed pages and existing blog articles to make sure the application could still read the migrated data.
I also opened the website in an incognito window to make sure I was testing the actual live site rather than relying on an existing browser session.
Everything worked as expected.
Migration Checklist
- ✓ Check the old Neon project's region
- ✓ Export important data from the Neon Console
- ✓ Create a database backup with
pg_dump - ✓ Verify the backup
- ✓ Create a new Neon project in an AWS region
- ✓ Restore the database
- ✓ Verify the tables and data
- ✓ Update the local
.env - ✓ Update the production
.env - ✓ Restart the application
- ✓ Test the live website
- ✓ Keep the old project temporarily as a rollback option
Final Thoughts
This migration turned out to be much less complicated than I initially expected.
The key thing I learned is that moving the database does not necessarily mean moving or redeploying the application code. In my case, the application stayed where it was. I created a new database, restored the data, changed the database connection string, restarted the application, and tested it.
Having a proper database backup before starting also made the whole process much less stressful.
#AWS #Azure #NeonDB #DBmigration #Signalleading #Insprana



![[8-Day Closmore SaaS Challenge] Day 5-6 — "What If...?"](/media/postuploads/error-handling-code-for-Closmore-SaaS-Day-5-6-What-if-audit-1.jpg)